30 July, 2024
Rendering in Glider Game
A while back, I was working on a game in my homemade engine where you would pilot a glider flying through an environment of endless canyons. And since no flight sim would be complete without some clouds, I quickly ran into the question of how I wanted to render them. Due to gameplay requirements (determined by me), I felt I couldn’t use the typical ray marched volumetric solutions. I was inspired by the recent lofi graphics aesthetic trend, and what I came up with was a custom deferred solution.
A Primer on Volumetrics
Typical solutions for rendering clouds break down to “for each pixel within some bounding area, march a ray through the volume, regularly sampling the amount of light being reflected by particles at the sample point. These samples are accumulated into the final pixel value, rays passing through the middle of the cloud will appear opaque while rays cutting along the sides end up being semi-transparent. The source of these samples can either be a 3d texture (if some particular pre-rendered appearance is desired), or a pure mathematical function (which is often less computationally expensive*, at the cost of artistic control). Using a fractal brownian motion function is what I did in a previous project here, and you can see an amazing example in shadertoy here.
This is a summary of the general solution for what are called “Volumetrics†in rendering, and it’s an approximation of how we see clouds in real life. And just like real life, as we enter these particle volumes it feels like the clouds disappear around us, as light scattering needs distance to accumulate in any given direction.
Personal Constraints
The problem was, I wanted my clouds to have a distinct border surface and I wanted there to be discrete “inside of cloud†and “outside of cloud†spaces, but real-life clouds just aren’t like that. But we’d often like them to be. Take this example of smoke effects in Riot’s FPS “Valorant“.
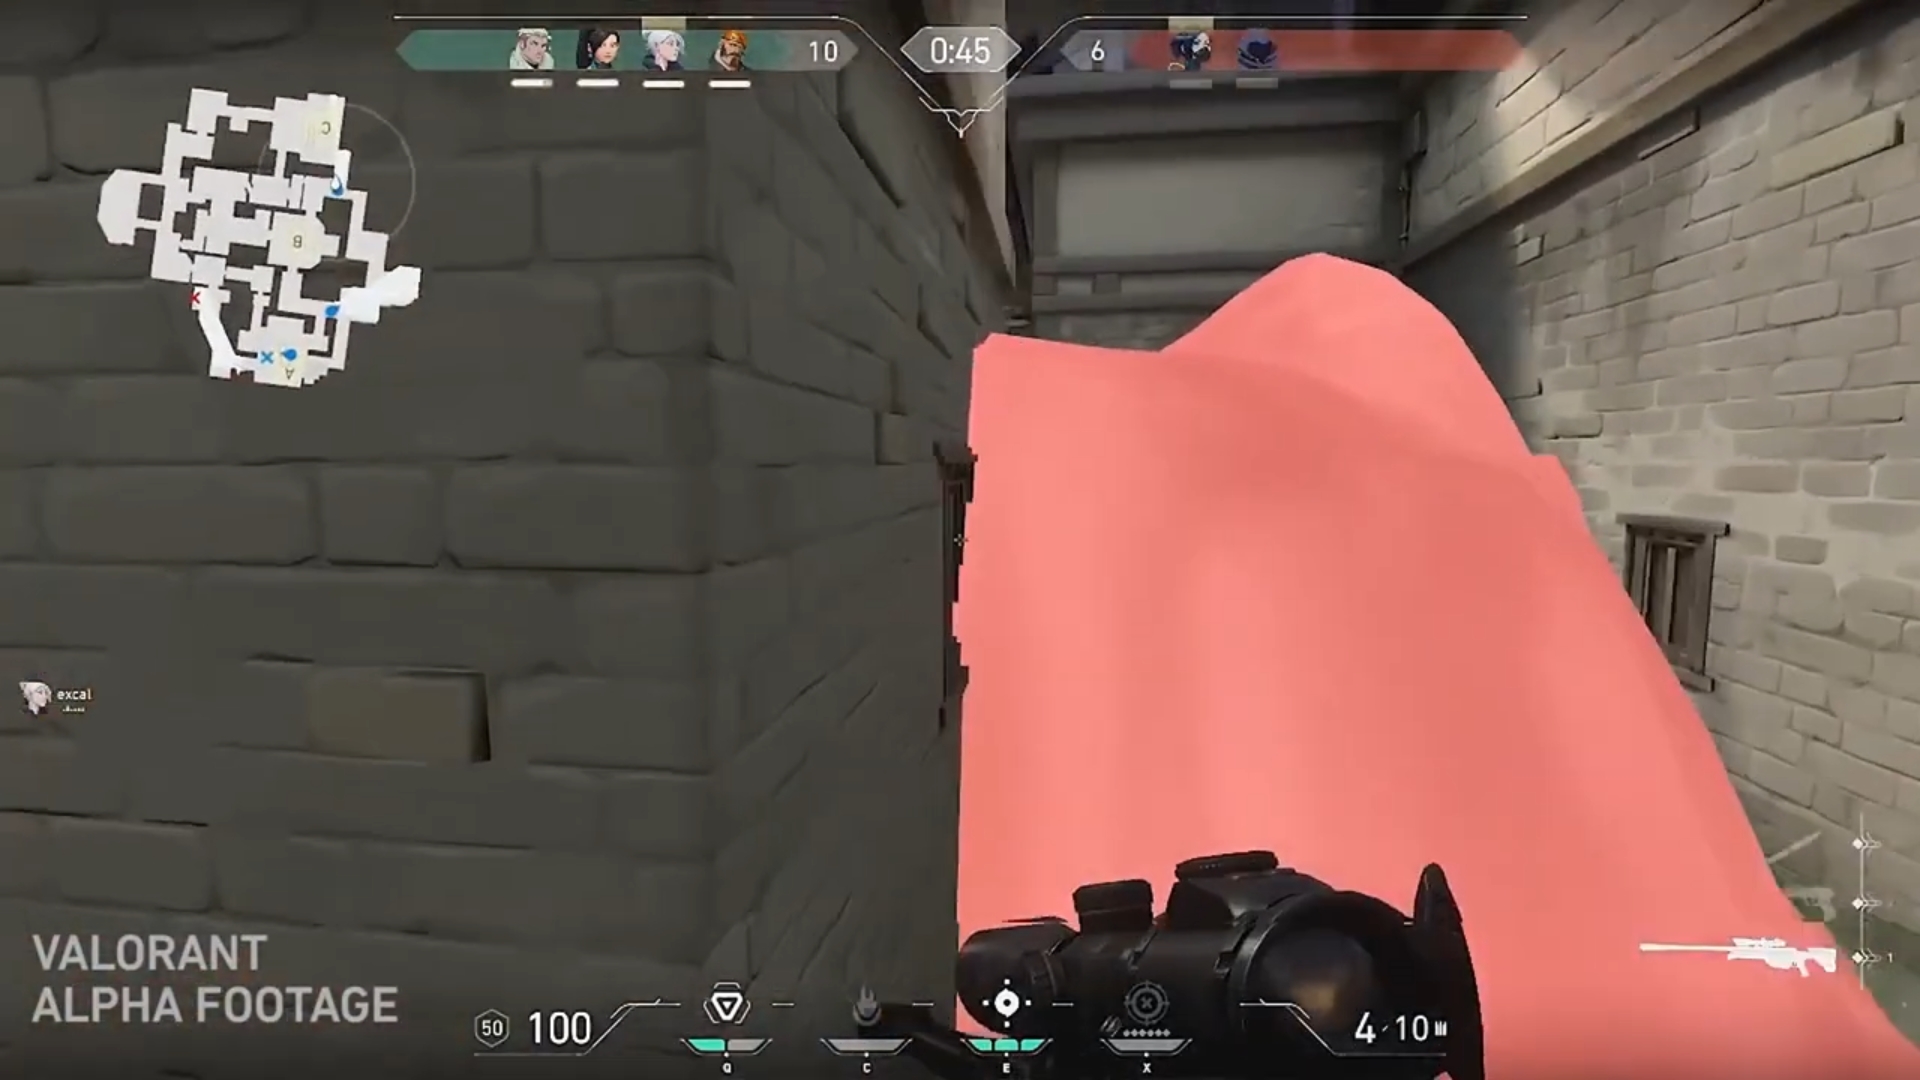
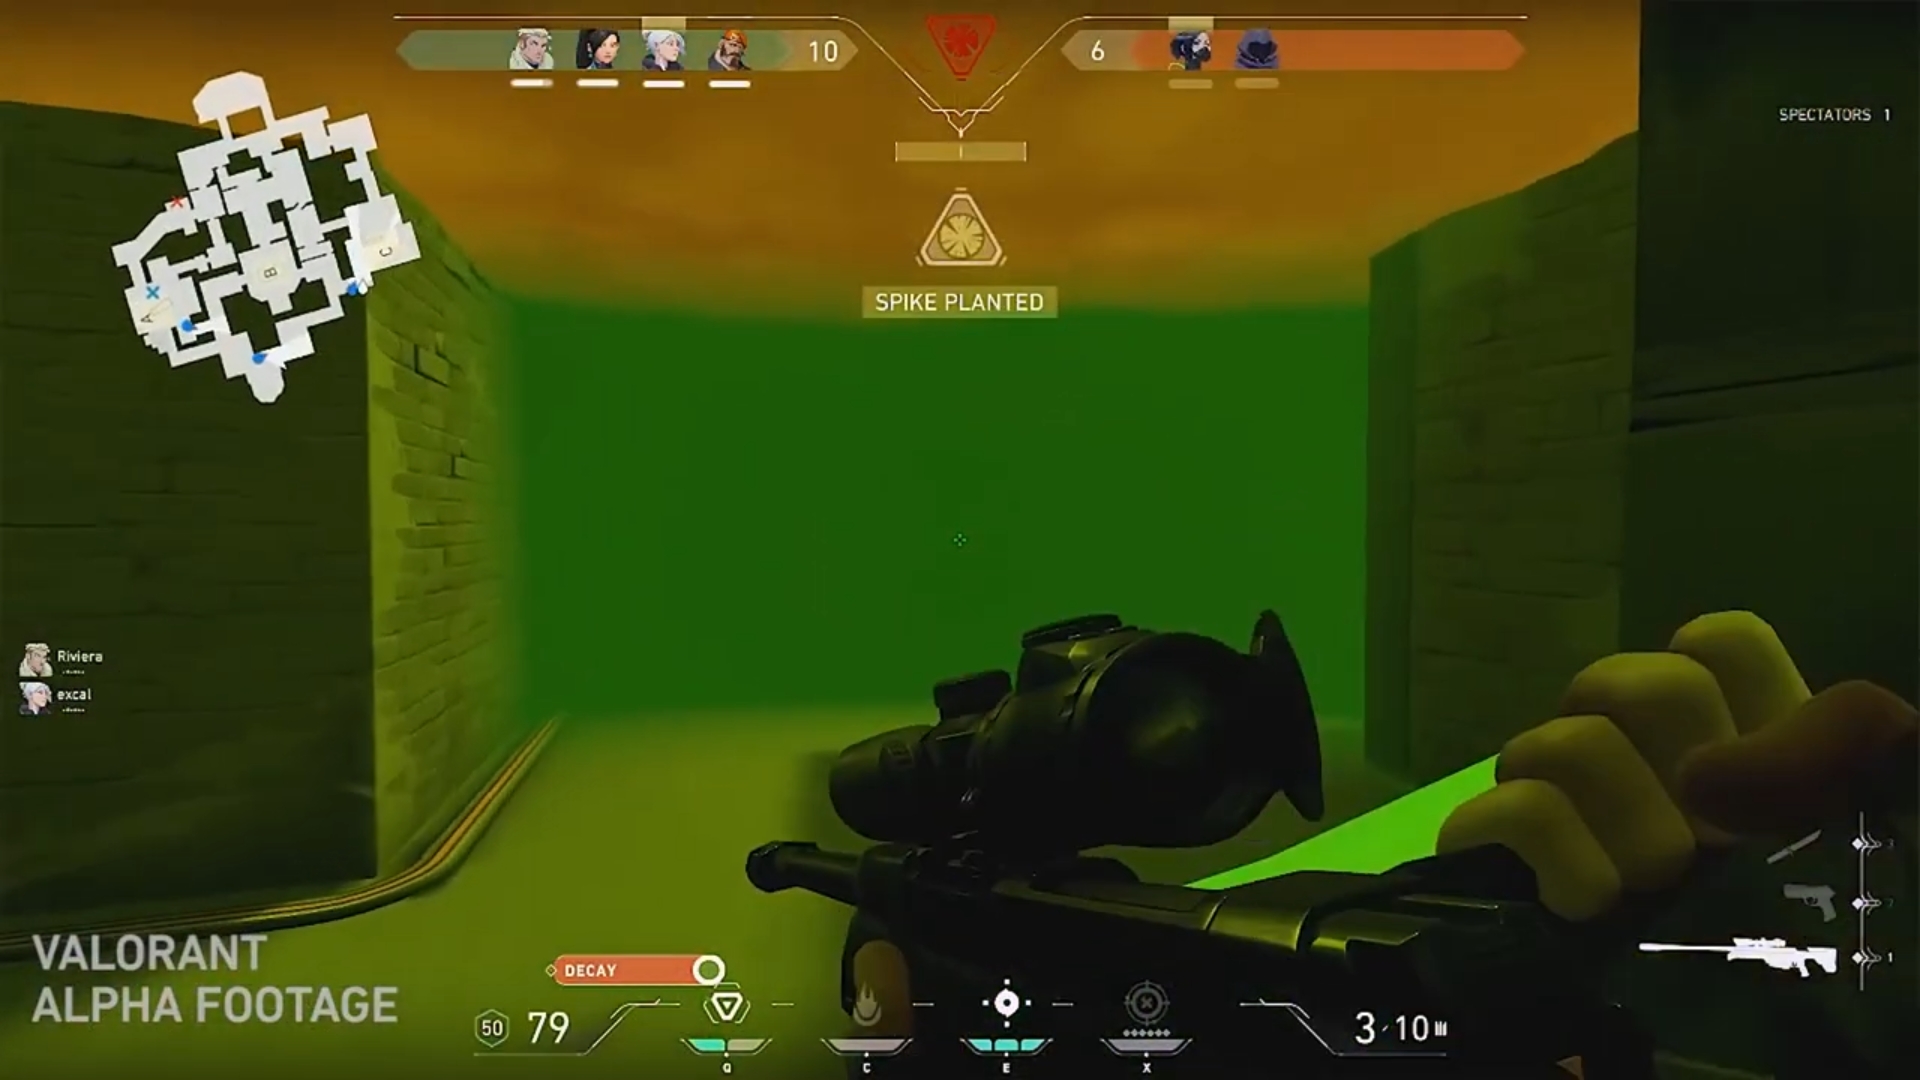
Smoke grenades (and effects like them) are essential to Valorant’s gameplay, centered around controlling sightlines. This simplified cloud effect allows the player to assess the situation quicker and respond accordingly. It also creates this nice inside/outside smoke visual dynamic that makes it easier to understand what's going on at a glance.
Rendering Breakdown
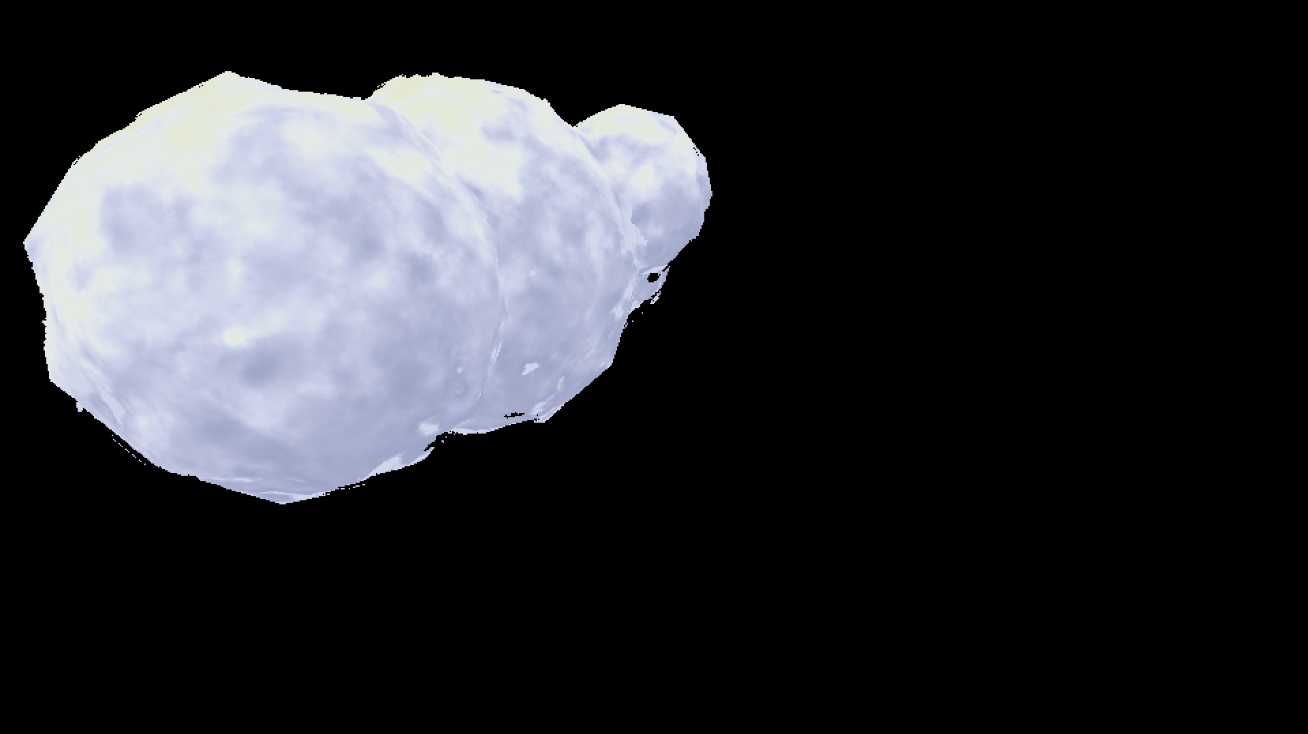
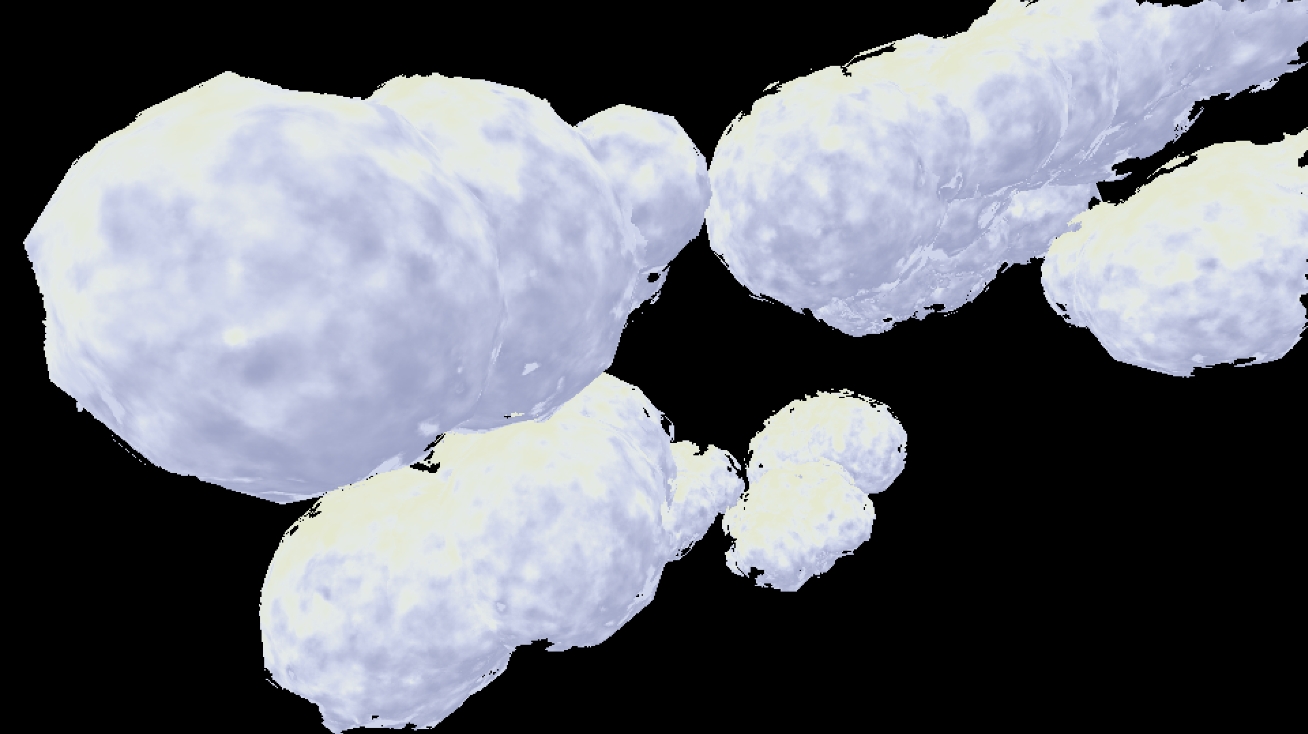
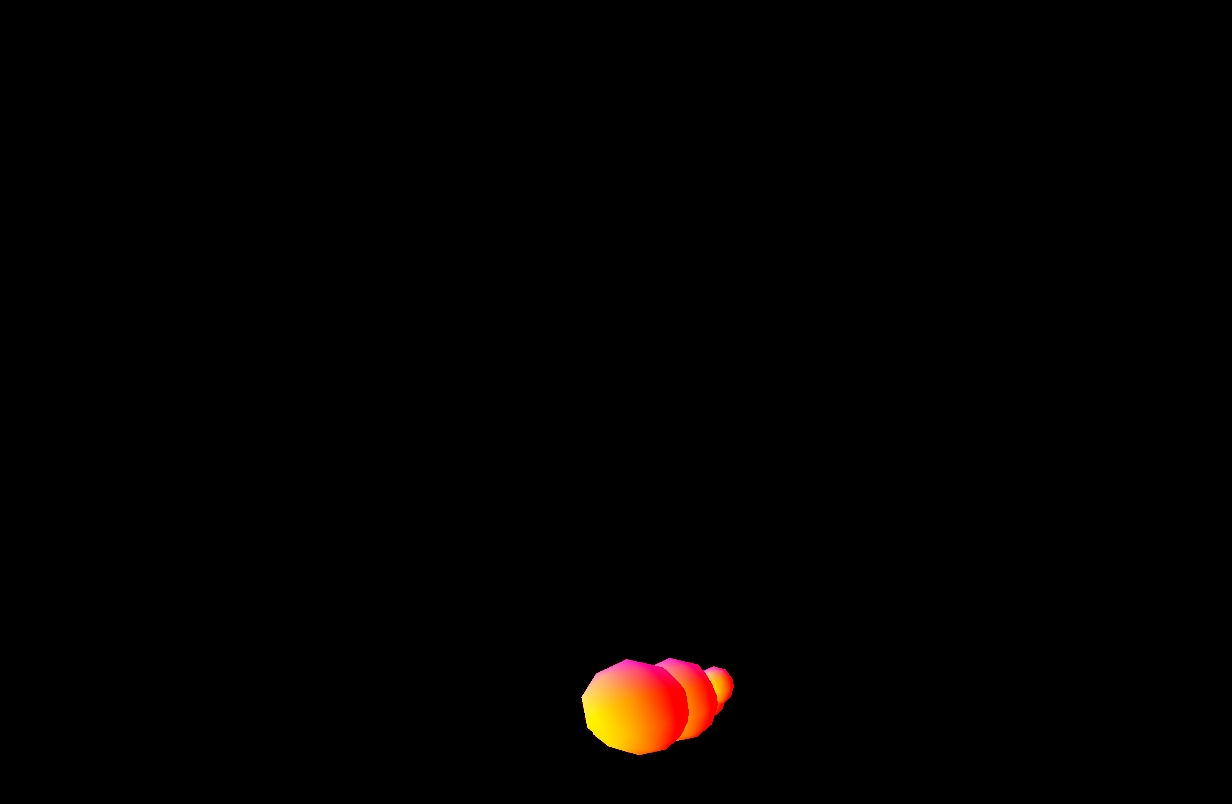
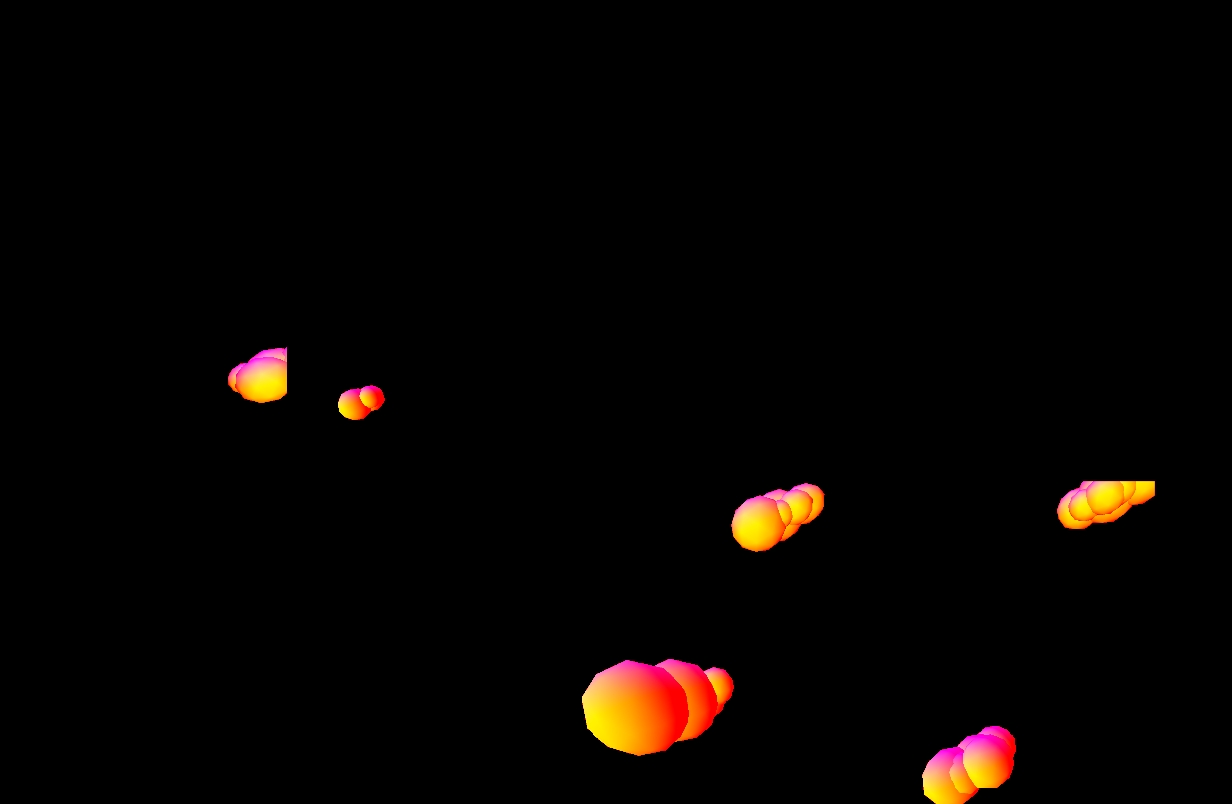
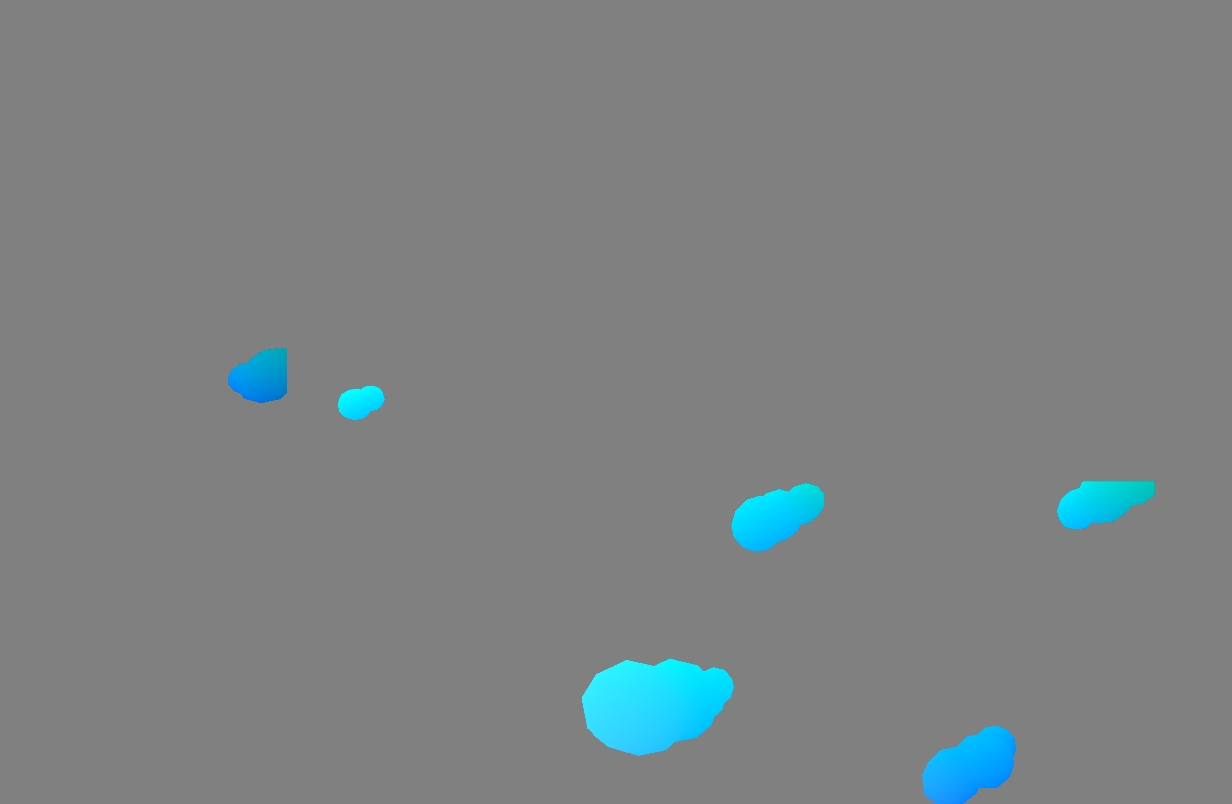
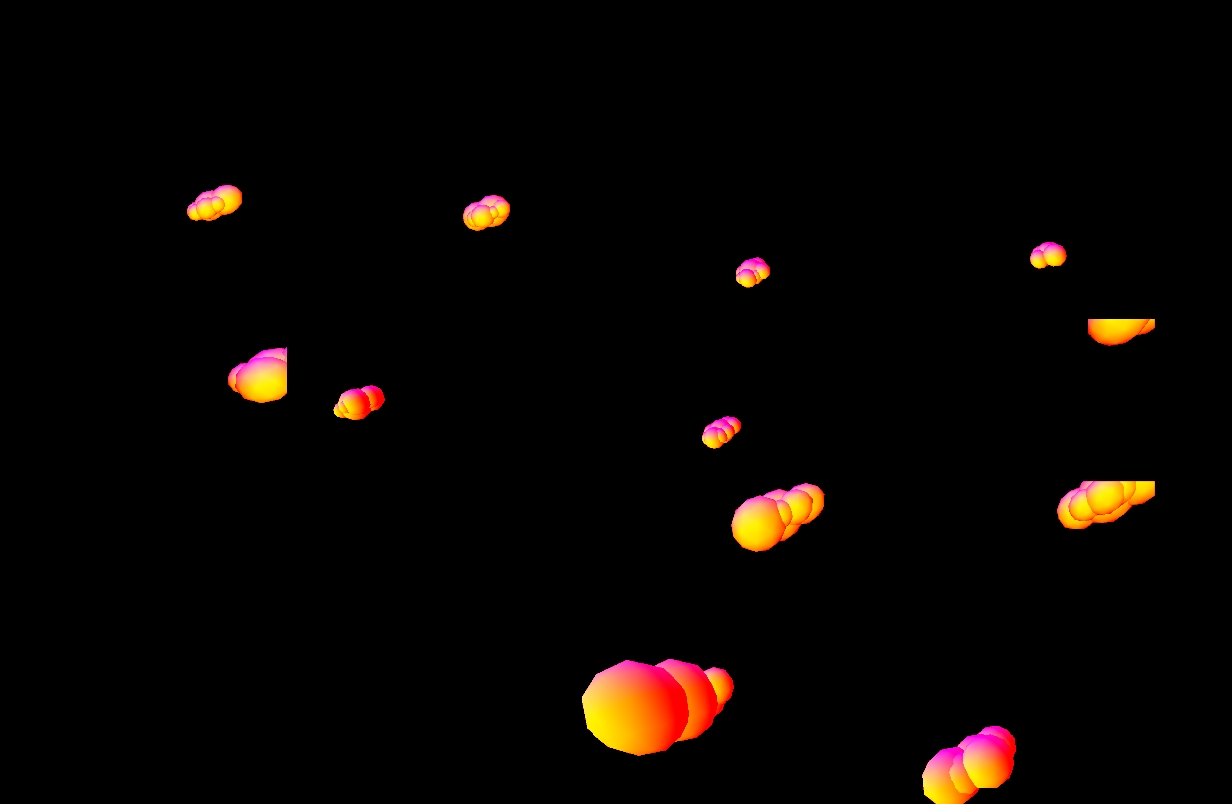
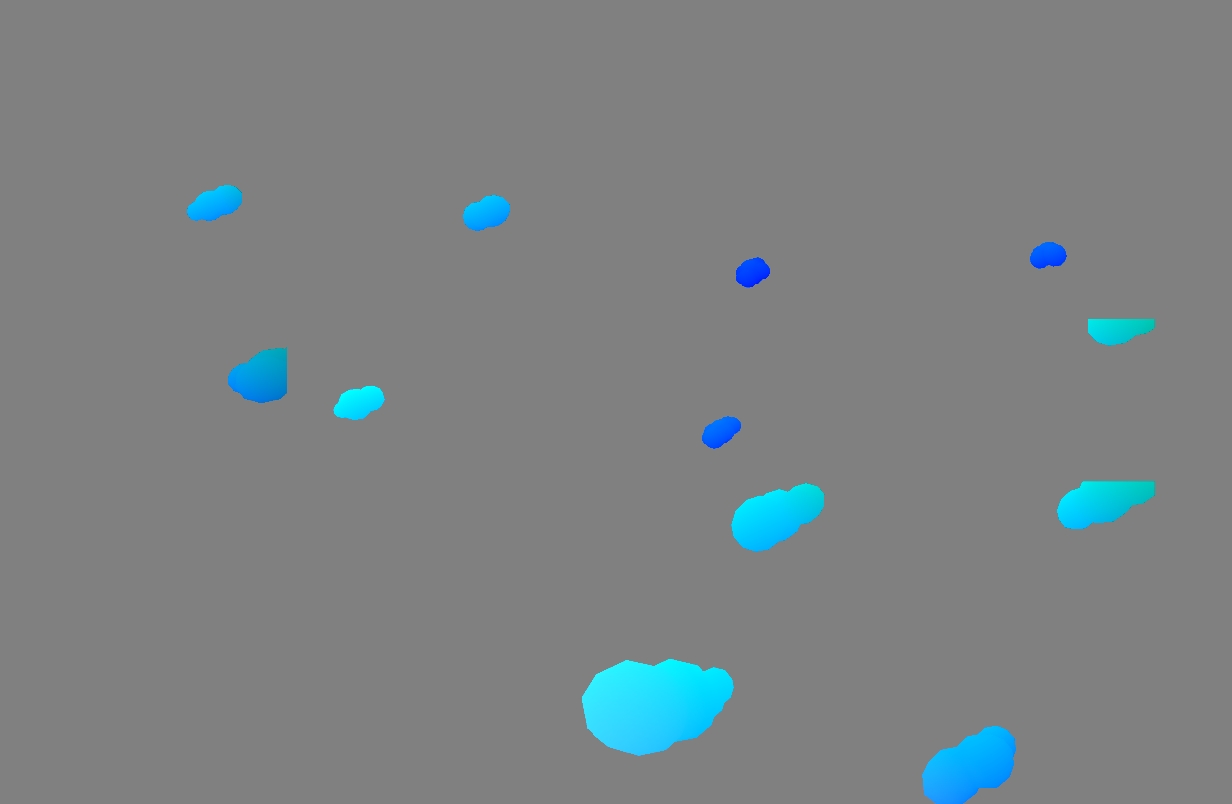
At the start, my clouds are just a bunch of sphere meshes grouped together. The cloud rendering component of this project’s rendering pipeline begins by rendering the base spheres of each cloud into two 4k atlases. These atlases contain each cloud’s pixel normals, world position, and distance. Each cloud (or sphere group) is rendered to a distinct section of the atlas.

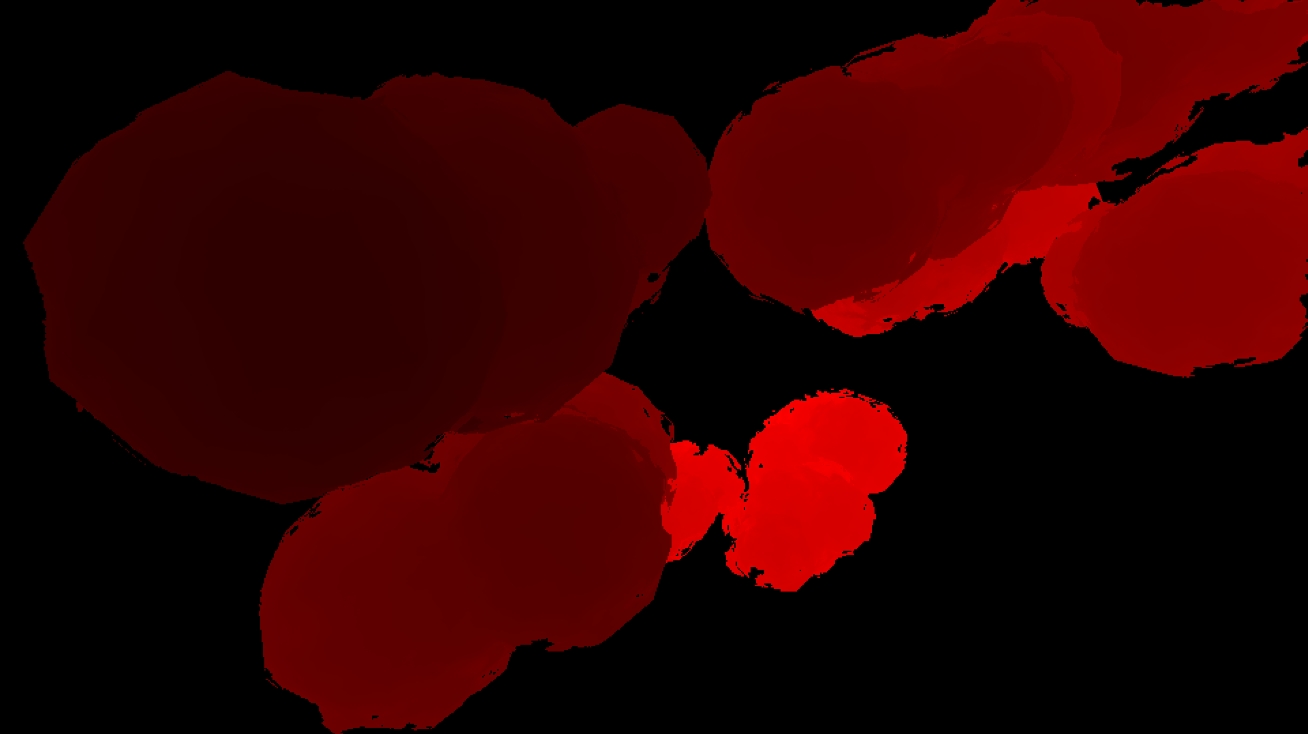
With the normal and world position atlases built we’re ready to render the clouds into one framebuffer. We do this by rendering the bounding rectangle of the cloud, with the data needed to lookup the corresponding section of the normal and world position atlases passed in as a uniform. From here, in the fragment shader, we execute a basic phong shading with light wrapping all the way around the cloud, with two instances of fractal brownian motion based turbulence thrown in. The first form of turbulence comes in the form of offsetting the sample coordinates with fbm when retrieving normals. This offsetting gives the clouds the rough edges compared to the smooth lines of the raw geometry. The second form of turbulence is applied to the normal samples themselves, before they are used to create the final shaded color. This offsetting produces the, well, cloudy cotton-y texture of clouds. As a final touch, I blend the colors for light and shadow in polar coordinates, allowing me to ensure that the shadows do not lose saturation as they often do in typical graphics pipelines.

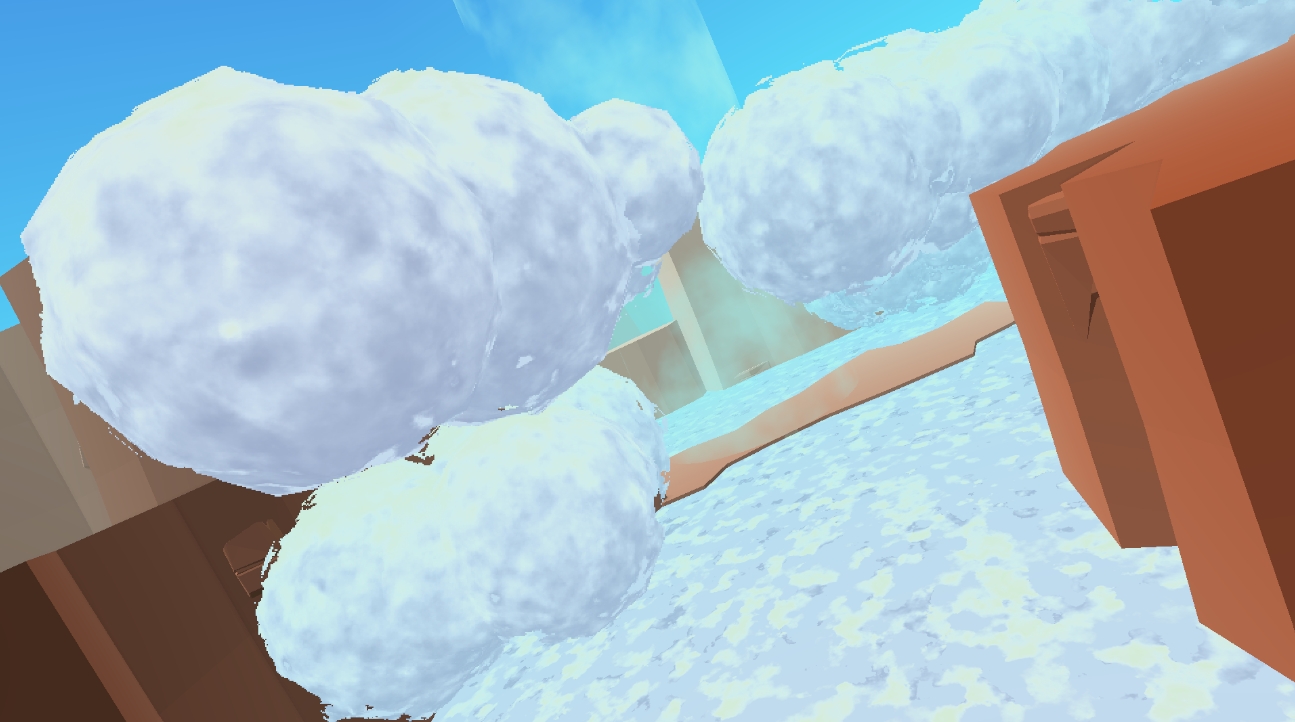
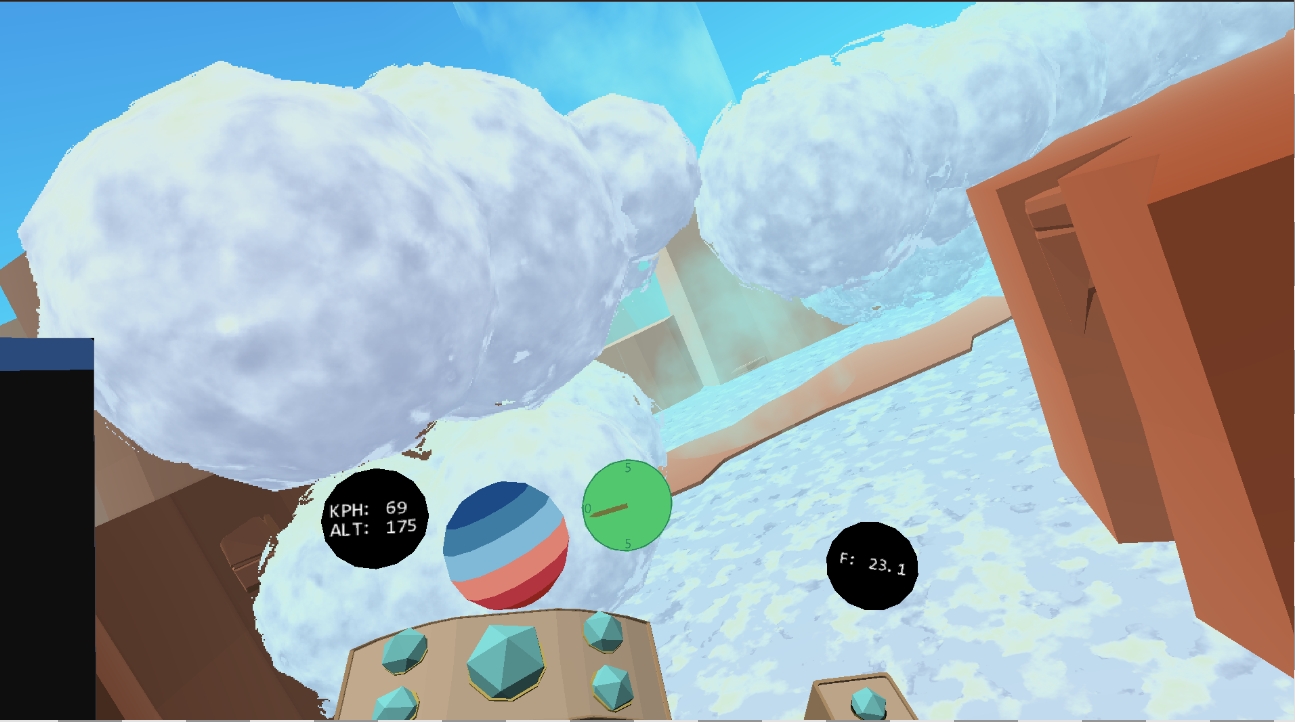
With the cloud layer complete, it’s time to composite it into the rest of the scene of static cliff meshes. Fun fact, these cliffs are procedurally generated, but that is outside the scope of this article. I also apply Rayleigh scattering to unify the scene and then render the glider mesh components on top.


Final Thoughts
Overall, I'm pleased with the look of these clouds, this solution runs very smoothly and has a very low graphics card requirement (30 FPS on my integrated intel laptop chip!), though I can’t help but fixate on what could improve them. For one, the base sphere meshes are still very obvious, some basic scaling, shearing, or morphing could add a lot of variety and visual interest. Additionally, there are clear seams between where the sphere meshes that make up a cloud meet up. Using something like metaballs to smooth out the normals before being baked into the atlas would probably be the best approach. Anyway, that’s it for now, hope you enjoyed reading!